Pages

Monday, January 31, 2011

Homemade Almond Milk: Take 2

Fresh Almond Milk
After my first experience with homemade almond milk, and it not quite failing, but not up-to-par either (a little on the watery side), I decided to give almond milk another shot! I found a different recipe that I figured was a better beginner's recipe. Very simple: just water and almonds! But I learned a new technique: how to blanch almonds! It is recommended to blanch almonds (remove their skins) before using them in almond milk because the skin tends add a slightly bitter taste. I found a recipe through Vegan Reader which I wanted to share with all of you!

Almond Milk

Ingredients
  • 1/3 cup raw almonds
  • 3 cups water, divided
(That's it?! Yup, that's it!)

Directions
  1. In a small pot, bring 1 cup of water to a boil. Add the almonds and boil for 3 minutes.
  2. Drain using a mesh strainer.
  3. Pour the almonds on a plate and let them cool slightly.
  4. When the almonds are cool enough to touch, remove the almonds from their skin. This is very easy, the almonds will pop right out. Naked almonds!
  5. In a blender, add 2 cups of water and the naked almonds. Blend until a creamy consistancy forms. Depending on how creamy you prefer your almond milk, you may need to add more or less water or almonds. It's your preference though!
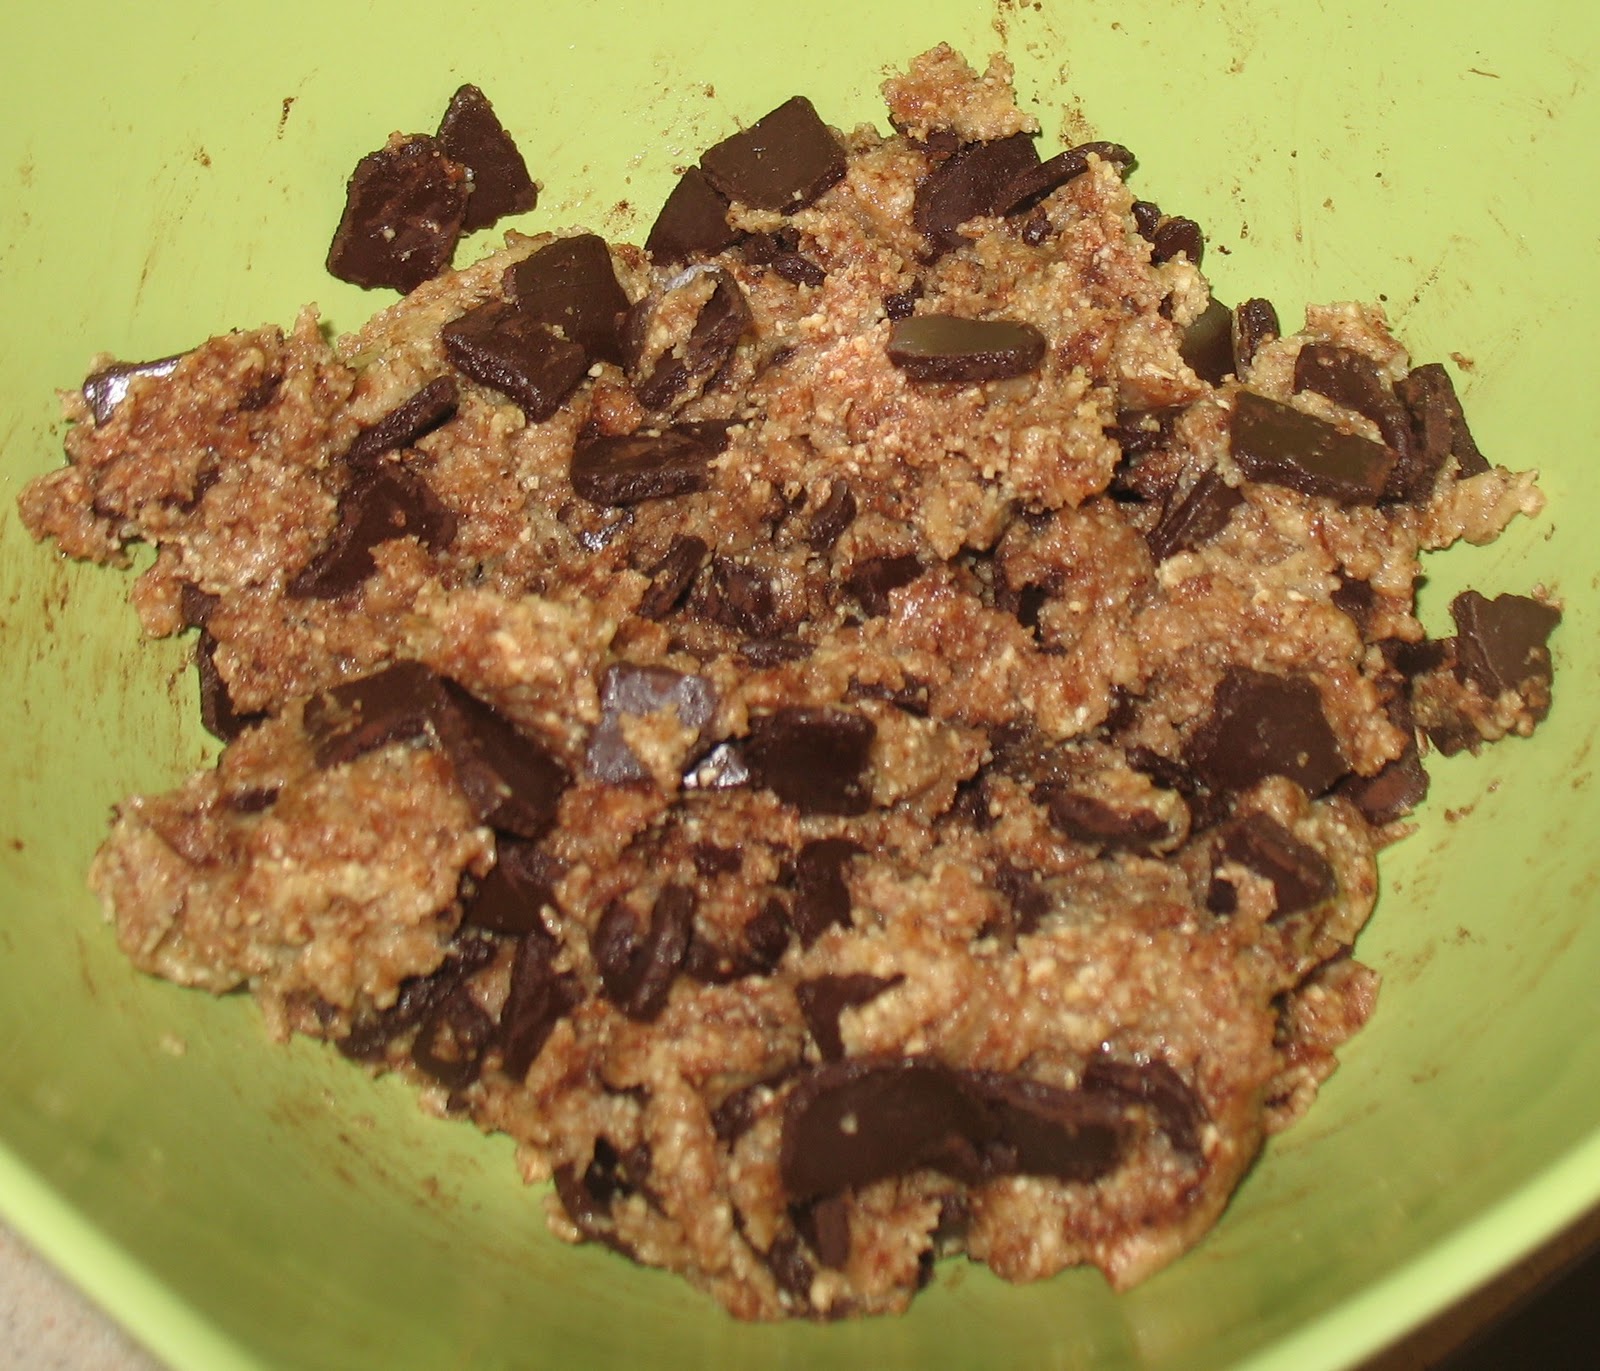
  6. Hold a mesh strainer over a bowl and strain the almond milk. A lovely result - fresh almond milk in your bowl and "pulp" in your mesh strainer, which can be used in desserts, such as raw chocolate chip cookies! Store the almond milk in a jar/pitcher/plastic bottle and keep refrigerated. Keep the pulp refrigerated until ready to use. You may notice the almond milk separates a bit while sitting in the fridge - no worries! Just shake it up before using.
I enjoyed learning how to blanch almonds and this was definitely a great recipe to use for those new at making almond milk! But I felt there was something missing in this recipe.... stay tuned for Homemade Almond Milk: Take 3!


Saturday, January 29, 2011

January 25, 2011 Recipe #4: Cornbread

After a long day at school, I don't know how I managed to find the energy, but I decided to take on Recipe #4 of The 2011 Cookbook Challenge: Cornbread! So it's 5:30 pm, just got home (after being at school since 6:45 am - I'm crazy) and I start making this cornbread, along with a fresh pot of chili (keep posted for a blog about my new chili recipe). I was done in an hour, exhausted, but still had quite an appetite!

Well, the cornbread was good, but it was nothing to go bragging about. It wasn't horrible but it wasn't great either. As I ate a piece of cornbread though, I just craved butter. Okay, for those of you who don't know me, I really don't care for butter... so for me to crave butter is just shockingly wierd! BUT I will tell you, that spread a little butter on this cornbread and it is so delicious! Since I have been trying the vegan diet, I used Earth Balance Natural Buttery Spread which is quite tasty! I couldn't tell the difference between this butter and regular butter. David liked the cornbread with a little butter but he prefers the sweet cornbread over this cornbread recipe (unsweet).

David had a great idea: to use the leftover cornbread in stuffing! I'll let you know if I end up doing this.

Friday, January 28, 2011

January 23, 2011 Recipe #3: Chocolate Cake with Buttercream Frosting

Our Sunday night dinner came along and we were quite excited for Recipe #3 of The 2011 Cookbook Challenge... Chocolate Cake! Yummy! I really like the vegan chocolate cakes... some people describe it tasting somewhere between cake and a brownie. And for some odd reason, I find that if I freeze the cake and then let it thaw out on its own, it tastes even better! I have noticed this a few times!

The cake recipe called for a choice of chocolate or buttercream frosting. I went with the buttercream frosting to avoid having a cake that was too rich, and my choice was perfect... it was delicious. The frosting was easy to spread on the cake and had a slightly hardened texture once refrigerated. Before refrigerating the cake though, I wanted to decorate the top of it. I recently learned how to make homemade chocolate, which I keep in the freezer until I'm ready to use it. I grated the chocolate with a microplane grater. Unfortunately, I didn't take a picture of the block of chococlate because it is really not pretty LOL. The chocolate shavings gave the cake a lovely look! Next time I will have to try making little chocolate curls on top!

I gave the leftover cake to Jacki before she left on Sunday night so that she could take the cake into work with her Monday morning. She shared it with her coworkers and they enjoyed it! One guy even wants the recipe!

So far so good with The Joy of Vegan Baking!


Thursday, January 27, 2011

Raw Chocolate Chip Cookies

I came across this raw cookie recipes with... get this... HOMEMADE CHOCOLATE CHIPS! Now this I seriously had to try!

Interestingly, this recipe comes from Oh She Glows, which couldn't be a more perect website for me. I felt I could really relate to this individual and her story so much. If you get a chance, you should read about Angela Liddon and how her passion for cooking came along.

Raw Chocolate Chip Cookies (Click for Oh She Glow's Original Recipe) 

Rolled out homemade chocolate
Ingredients 

For the cookie dough:
  • 1 (8-oz) pkg raw cashews
  • 1/3 - 1/2 cup almond pulp
  • 3/4 cup ground oats (rolled oats ground to a flour consistancy) 
  • 1/4 cup light agave nectar
  • 2 teaspoon vanilla extract
  • 1/4 cup coconut oil   
    Chocolate "chips"
    
For the chocolate chips:
  • 2 Tablespoon coconut oil
  • 1 cup cocoa powder (substitute 1/2 cup carob powder for sweeter, less bitter flavor)
  • 1/4 cup light agave nectar
  • 2 teaspoon vanilla  
Directions 
  1. To prepare the cookie dough: In a food processor, finely ground the cashews. Add the pulp, oats, agave nectar, vanilla, and coconut oil and gently pulse until a dough forms. Form the dough into a large balla nd chill in the refrigerator until ready to use.
  2. To prepare the chocolate chips: Mix all of the ingredients together in a medium bowl until a ball forms. Roll out onto parchment or wax paper (to avoid sticking) and place in the freezer for about 30 minutes. When chocolate is frozen, break into small pieces or "chips". 
  3. 
    Mmmm.... cookie dough!! No need to worrry about
    Salmonella with no eggs present! Woohoo!
    To make the raw cookie: Mix the chocolate pieces into the dough. Roll into 1-2 inch balls. Place in a container with parchment or wax paper and refrigerator for at least 30 minutes to harden. 
  4. Other options for this cookie.
    • After rolling into balls, roll in coconut or dip in melted chocolate.
    • Instead of rolling into balls, use a rolling pin to roll out the dough and use cookie cutters.
    • Use other mix-ins: raisins, chopped dates, etc.

Homemade Almond Milk: Take 1

I've been loving almond milk these days! I didn't think I would enjoy it so much, but it really is delicious! And it's nice to know it's healthy for you and loaded with lots of vitamins!

You know what almond milk is so good in? Homemade Hot Cocoa! It is delicious! Cocoa powder, a little raw sugar, almond milk, and some vanilla and almond extracts. Oh my.. it is wonderful!

Well, I heard it was pretty easy to make almond milk yourself, so I decided to give it a try! I found a recipe on a blog I follow: Run Hard Eat Clean.

Finely-ground Almonds

"Almond Joy" (click link to view the original recipe)

Ingredients
  • 1/2 cup almonds
  • 1 tbsp agave nectar
  • 1/2 tsp of vanilla extract
  • 2-5 cups of water
Directions
  1. Blend the almonds in a blender until finely ground. Add the rest of the ingredients to the blender and blend on high until smooth. Leave the "pulp" in for extra thickness or drain using a sieve (or coffee filter) for a milker consistancy. 
  2.  
  3. Refrigerate the milk. Save and refrigerate the pulp for a later use, such as mixing into baked goods!
    The "Pulp"
    Don't discard the ground-up almonds -
    they are perfect for adding to dessert recipes!
    
Well, this was my first time making almond milk, and let's just say you really need to play around with the ratio of almonds to water until you reach your personal preference. With 1/2 cup almonds and 4 cups of water, I felt the mixture was a little too watery. More water if you want your milk closer to a skim milk consistancy, and less water (or more almonds) if you want a creamier consistancy. Next time I will have to trying reducing the amount of water to 2 - 3 cups.

Keep posted for a recipe I made with the almond pulp!

Tuesday, January 25, 2011

Update on Avi!


January 23, 2011 - 6 months old!
 It's that time to give you an update on Avi, our avacado tree. He's getting bigger! Not quite growing avacados yet (he has a long, long time until then), but his leaves and stem continue to grow longer and wider!

Avi tends to really perk up in the mornings, but as the evening nears, he droops quite a bit. This seems to be a daily pattern though. For a while, Avi stayed indoors, but when we realized fruit flies were coming around quite often, we decided it was time for him to stay outside and we hoped he would be okay in our random Florida weather. Avi has adapted well and David takes great care of him! I just watch and take pictures... I think David is afraid to let me care for a plant, for fear of me forgetting about it with my horrible memory! LOL. He wasn't doing too great a couple of days ago; there was a lot of rain last friday night and Avi's home flooded a bit. After a couple of days he was back to himself though! It is so exciting to track how far Avi has come along! And he's still going strong too!

It's tough trying to maintain a garden when you live in a rented townhome with a very small backyard. I feel a bit restricted! Eventually I would love to grow my own garden with an unlimited amount of fresh herbs, fruits and vegetables! One day it will happen :) And when it does, I will make sure to talk to Mr. and Mrs. J. about their thoughts and tips on a successful garden!

Monday, January 24, 2011

Grilled Jamaican Jerk Tempeh with Veganomicon's Mango and Black Bean Quinoa Salad

We had a delicious dinner Sunday night, with the wonderful company of David's mom (eh-hem, a.k.a. Bella's grandma)! David and I decided we wanted to grill... but what to grill? Well, we love Jamaican jerk chicken, but since I haven't been in the mood for meat, I decided to try out this marinade with tempeh. Oh my goodness, it was DELICIOUS! I have to give a big thank you to a recipe contributor of Allrecipes who created this fabulous marinade! I wouldn't change a thing about it. It is so flavorful! 

This time I steamed the tempeh for 10-15 minutes before putting it into the marinade. The tempeh did not have the slight bitterness that I tasted from my first experience with tempeh when I boiled it. I'm not saying that boiling doesn't work, but that steaming the tempeh seemed to work out better for me. I marinated the tempeh in the Jamaican jerk marinade for 24 hours. The tempeh really soaked up all of the flavors so nicely! I had leftover Jamaican jerk tempeh tonight that I was craving all day!

Jamaican Jerk Tempeh

Ingredients

For the marinade (click for original recipe):
  • 1 bunch (6-8) green onions, chopped
  • 1 onion, chopped
  • 1 jalapeno pepper, seeded and minced
  • 3/4 cup low sodium soy sauce
  • 1/2 cup distilled white vinegar
  • 1/4 cup vegetable oil
  • 2 tablespoons organic brown sugar
  • 1 tablespoon fresh thyme leaves
  • 1/2 teaspoon ground cloves
  • 1/2 teaspoon ground nutmeg
  • 1/2 teaspoon ground allspice
For the tempeh:
  • 1 (8-oz) pkg tempeh, quartered diagonally, steamed for 10-15 min and cooled
Directions
  1. Combine all of the ingredients for the marinade in a food processor. Process for 15-30 seconds.
  2. Place the tempeh in a ziplock bag, plastic container, or 8"x8" glass dish.
  3. Pour approximately 1/3 of the marinade into the bag, container or dish (whichever you prefer). The remaining marinade can be saved for another use - it freezes well!
  4. Marinate the tempeh, in the refrigerator, for at least 1 hr or up to 24 hrs. The longer the tempeh marinates, the more flavorful it will be!

I love the colors in this salad! Deliciously beautiful!

Since we planned on making such a great main dish, I wanted to find a fun side dish recipe. I took a look in Veganomicon and saw their recipe for quinoa salad. Yum! And geez-oh-man, was it ever so good!

Veganomicon's Quinoa Salad with Black Beans and Mango (with a few minor changes!)

Ingredients
  • 1 cup red quinoa, uncooked
  • 2 cups water
  • 1 mango, peeled and diced
  • 1 red bell pepper, diced
  • 1 bunch scallions, choppped
  • 1 cup fresh cilantro, chopped
  • 2 tbsp red wine vinegar
  • 2 tbsp grapeseed oil
  • 1/4 tsp salt 
  • 1 (15-oz) can black beans, drained and rinsed
Directions
  1. In a small pot, bring the quinoa and water to a boil and simmer covered for 15 minutes.
  2. In a medium bowl, combine the mango, red bell pepper, scallions, and cilantro.
  3. Stir in the red wine vinegar, grapeseed oil, and salt.
  4. Add the quinoa and stir until well-combined.
  5. Fold in the black beans.
  6. Keep refrigerated until ready to serve. Best when served at room temperature for more flavor.
  7. Serves 4-6. 
By the way, David and his mom both enjoyed the amazing Jamaican jerk chicken with delicious sides of Veganomcon's quinoa salad, my mom's famous roasted potatoes (which I need to blog about sometime), and grilled veggies with our favorite Bone Suckin' Seasoning! Yummy!!

Sunday, January 23, 2011

Chicken and Rice Bake

So I've been trying all of these "vegan" recipes lately, but I haven't forced David to eat them after his initial impression of tofu. He really hasn't had any GREAT meals though, so I decided to look and see what I could make for him.

I happened to be in luck and have all of the ingredients for Chicken and Rice Bake that I found at Campbell's Kitchen. I added vegetables and other seasonings to make this dish a tad more exciting! Enjoy!

Ingredients
  • 1 can cream of mushroom soup
  • 1-1/3 cup water
  • 3/4 cup uncooked regular long-grain white rice
  • 1/4 tsp onion powder
  • 1/4 tsp garlic salt
  • 1/4 tsp ground black pepper
  • 1/4 tsp paprika
  • 2-3 celery stalks, died
  • 1 medium carrot, diced
  • 1/2 - 1 cup broccoli, chopped
  • 1/2 - 1 cup cauliflower, chopped
  • 3-4 (1-1/4 lbs) skinless, boneless chicken breast halves
Directions
  1. Preheat oven to 375 degrees F.
  2. Stir all of the ingredients except the chicken in a 2-quart shallow baking dish. Top with the chicken. Season with additional paprika, salt and black pepper. Cover the baking dish.
  3. Bake for 45 minutes or until the chicken is cooked through and the rice is tender.

Saturday, January 22, 2011

Cheers!

I am so excited that I just had to share with you all! My first recipe, Vegan Ho`olaule`a (Hawaiian Celebration) Cake, has been featured today on the front page of VegWeb.com. So exciting! This cake was baked for the special Mr. and Mrs. J., who are newlyweds! David and I wanted to celebrate with them when thy came to visit us for New Year's. What a good time we had! Too bad we don't live closer!

I recently found out Mr. and Mrs. J. will be baking this delicious cake on their anniversary. I am so happy they loved it!

I can't wait until others try this recipe! I hope they like it! It is delicious, but very ADDICTING!

Thank you everyone for all your support!

-Rachel

Chocolatey Peanut Butter Brownies

This was a little thank you to our maintenance crew for improving our screwy stove! While one of the guys was fixing our stove I asked what I could bake for him..."Anything with peanut butter!" LOL. So I found a recipe for peanut butter brownies on Allrecipes and modified it just a bit! Enjoy!

Chocolatey Peanut Butter Brownies (Cick to view original recipe)

Ingredients
  • 1 cup crunchy peanut butter
  • 4 eggs
  • 2 tsp vanilla extract
  • 2 cup packed brown sugar
  • 1/2 cup (1 stick) unsalted butter, softened
  • 2/3 cup all-purpose flour
  • 2/3 cup cocoa powder
  • 1/2 tsp baking powder
  • 1/2 tsp salt
  • 1/2 cup semi-sweet chocolate chips
  • 1/2 cup Reese's peanut butter chips
Directions
  1. Preheat oven to 350 degrees F. Grease a 9"x13" Pyrex dish.
  2. In a large mixing bowl, cream together the peanut butter and butter. Add the brown sugar, vanilla and eggs and beat until light and fluffy. Combine the flour, cocoa powder, baking powder, and salt in a separate bowl. Add to the butter mixture and mix until well blended. Stir in the chocolate chips and peanut butter chips.
  3. Spread batter evenly into pan and bake for 35-40 minutes or until toothpick comes out clean. 

Friday, January 21, 2011

The Ugly Little Vegan Pizza

Every Sunday we have dinner with David's mom and I like to change up our meals once in a while. Well, this past sunday was homemade pizza! Of course, since I've been all about veganism these past few weeks, I decided to come up with a special pizza for myself. It didn't turn out too pretty, but I had to share it with you because it was DELCIOUS! I had this three nights in a row and by the third night, I was still craving more!

Here's how my ugly little vegan pizza was made:
  1. Herb Crust Pan Pizza: Thanks to VegWeb!
  2. Sauce: a combination of tomato sauce, tomato paste, and italian seasoning
  3. Sun-dried tomatoes, soaked in water for 15-20 minutes
  4. Thinly-sliced green bell pepper and red onion, sauteed in olive oil, salt, pepper, and garlic powder
  5. Tofu Ricotta: Thanks to Veganomicon!
  6. Tofu pepperoni: Sold in local grocery stores!
  7. Cheezy Sauce: Again, thanks to Veganomicon!
I placed the pizza dough into an 8x8 Pyrex dish, then layered it with the rest of the ingredients. I happened to have leftover cheezy sauce from the first time I made it, which I had froze. So I decided to use it on my pizza; I thawed it out, reheated it, then poured it over the top of the pizza. I baked the pizza at 425 degrees F for 15-20 minutes. Delicious, yet ugly!

Thursday, January 20, 2011

January 16, 2011 Recipe #2: Fruit Tart

Okay, I kept my word! I am officially following the random sequence generator for The 2011 Cookbook Challenge and this fruit tart was first on the list! What a perfect dessert to go with our weekly Sunday night dinners with David's mom!

This recipe was a bit of work, but it was a lot of fun putting it together. Turns out, this recipe uses two other recipes in the cookbook: Shortbread Crust and Pastry Cream. Ooooh goody! I can check those off my list too!


Shortbread Crust

The shortbread crust was prepped first and allowed to cool before using it. The pasty cream was also prepped beforehand and refrigerated until ready to use. Funny story for ya... while I was making the pastry cream (stovetop), I went to remove the pan from the heat, and then added the vanilla extract to it. Well.. the pastry cream was still hot and as I added the extract I got a HUGE wiff of alcohol! Woo! This is why you're not supposed to add extract over heat - otherwise, the alcohol will evaporate off, and apparently go straight to your head! I learned recently that extracts are made with vodka... interesting, right?

The tart was layered, starting with the shortbread crust on the bottom, then a layer of Braswell's black raspberry preserves, followed by the pastry cream and topped with a variety of fresh fruit! I used chopped peaches, and sliced kiwi, strawberries and bananas to decorate. Delish! The tart was then glazed with more preserves (which, to me, doesn't look so pretty). It was delicious though! The shortbread crust was really good too! Tastes just like a cookie! And the fruit tart would not have been possible without the pastry cream! Yum!

Wednesday, January 19, 2011

Dreena's Moroccan Bean Stew with Sweet Potatoes

I saw this recipe posted on Dreena's Vegan Recipes and just knew I had to try it! If you love trying new foods and flavors, you will LOVE her blog. This is also where I got the recipe for  raw brownies, which, if you haven't tried them yet, they are fantastic! Really, you have no idea what you're missing out on :)

I just love sweet potatoes, and they fit so wonderfully in this stew! The flavors are amazing too! I'm not used to trying all of these ethnic flavors, but it has been a positive experience! I had never tried the coriander and turmeric spices before, but the combination of all of the spices in this recipe was delicious. I also found the addition of cinnamon a little odd, but it really makes the overall flavor of the stew that much better!

Thank you Dreena for posting another fabulous recipe and allowing me to blog about it!

Moroccan Bean Stew with Sweet Potatoes (Original Recipe)

Ingredients
  • 1 1/2 tbsp olive oil
  • 1 tsp cumin seed
  • 3/4 tsp ground cumin
  • 1 1/2 tsp cinnamon
  • 1 tsp ground coriander
  • 1/2 tsp turmeric
  • 1/2 tsp fennel seeds
  • 1 tsp dried basil
  • 3/4 tsp sea salt
  • Few pinches cayenne pepper
  • Ground black pepper
  • 2 medium onions, chopped
  • 3-4 garlic cloves, minced
  • 4 (small/medium size) sweet potatoes, peeled and diced
  • 1 (14 oz) can black beans, rinsed and drained
  • 1 (14 oz) can chickpeas, rinsed and drained
  • 1 cup dry red lentils, rinsed
  • 3 cups vegetable stock
  • 3 1/2 cups water
  • 1 1/2 tbsp freshly grated ginger
  • 1 (12-oz) bag fresh spinach
Directions
  1. In a large pot over medium heat, cook the oil, spices and salt for 1-2 minutes. 
  2. Add the onion, garlic, and sweet potato. Stir through, cover, and cook for about 7-8 minutes, stirring occasionally, until the onions have started to soften.
  3. Add the remaining ingredients except ginger and bring to a boil. Reduce the heat to medium-low, cover, and cook for 20-25 minutes, until lentils are fully dissolved.
  4. Add the fresh ginger and spinach, stir through until the spinach leaves are wilted, and serve.

Tuesday, January 18, 2011

January 15, 2011 Recipe #1: Blueberry Lemon Muffins

The very first recipe of The 2011 Cookbook Challenge! Yay! Blueberry Lemon Muffins!

Okay, so I kind of cheated... rather than start with the first page number listed from the random sequence generator, I picked this recipe... ONLY because I had some blueberries I needed to use. But from here on out I give you my word that I will be making the recipes that fall on the page numbers given by the random sequence generator! I didn't have to tell you I cheated but I felt guilty for listing a rule I already failed! David has called me a "goober" for mentioning this to all of you. Hey, at least I'm honest!
Breakfast: A blueberry lemon muffin with fresh fruit!

Well the blueberry muffins passed! They were delicious! I did however make a few little changes. The addition of cinnamon into the batter was wonderful and I doubled up the amount of lemon extract, instead of using  lemon zest the recipe had called for. I also couldn't resist sprinking a little cinnamon-sugar mix on top of the batter before popping them into the oven. Amazing! I decided to change the baking temperature too, which originally called for 400 degrees F. In my opinion, and with experience, muffins should be baked at 350 or 375 degrees F. A couple of months ago I baked muffins at 400 degrees F and after carefully watching them and making sure the inside of the batter was cooked enough, they ended up being a little more well done on the outside than I would have liked. Unfortunately, I haven't had a good experience using that temperature for muffins.

But cheers to the first recipe being a hit! I will be happen to post the recipe if anyone is interested! Enjoy!

Monday, January 17, 2011

Here we have it...

The 2011 Cookbook Challenge!!


Welcome to my very first cookbook challenge! While Mr. and Mrs. J. came for a New Year’s visit, we talked about doing a cookbook challenge, similar to the movie Julie and Julia, starring Meryl Streep and Amy Adams. Honestly, that movie is the reason why I started my own blog, For the Love of Food! Mr. and Mrs. J. were challenged to do all of the recipes in Veganomicon. Take a look, they have already begun!

I, on the other hand, really wanted to brainstorm a little before I chose the cookbook for this challenge. Now, of course all of you know, or should know by now, I have an incredibly gigantic sweet tooth and I LOVE to bake! So I knew I wanted to do this challenge with baking. But what cookbook would I decide on? Well my New Year’s resolution was to begin making healthier desserts. Still delicious, but a little nicer to those hips!

So I got it! With quite a few cookbooks to decide from, The Joy of Vegan Baking: The Compassionate Cooks' Traditional Treats and Sinful Sweets by Colleen Patrick-Groudreau was the winner! Perfect!

Here are the rules I’m making for my cookbook challenge…
  1. Make EVERY recipe in the book.
  2. SLIGHTLY modify the recipe for personal taste or enhanced health benefits.
  3. Blog about every recipe, but only post the recipes through the request of readers.
  4. Make at least one recipe a week.
  5. Recipe order: Provided by the Random Sequence Generator.
  6. Goal: To finish the cookbook by the end of 2011.
I am very excited to start this challenge! I hope you all follow me on my journey through The Joy of Vegan Baking! Enjoy! And let's begin...

A healthier, yet delicious, option for your sweet tooth: Pumpkin Crumb Cake with Pecan Streusel

Going strong with my "healthy dessert" New Year's resolution, I decided to try out a yummy cake recipe in Veganomicon. I only made slight changes to the recipe, such as raw vs granulate sugar and almond vs soy milk. Other than that, I followed the recipe to a tee and it was delicious! I think David enjoyed it the most! Who knew David would like something VEGAN!


Veganomicon's Pumpkin Crumb Cake with Pecan Streusel

Ingredients

For the pecan streusel:
  • 1/4 cup all-purpose flour
  • 3 tbsp brown sugar
  • 1/4 tsp ground cinnamon
  • 1/4 tsp ground allspice
  • 1 tbsp canola oil
  • 1 cup pecans, coarsely chopped
For the cake:
  • 1 (15-oz) can pumpkin
  • 3/4 cup almond milk
  • 3/4 cup canola oil
  • 1-1/2 cups turbinado sugar (raw)
  • 3 tbsp molasses
  • 2 tsp pure vailla extract
  • 2-2/3 cups all-purpose flour
  • 1 tbsp baking powder
  • 1 tsp salt
  • 1-1/2 tsp ground cinnamon
  • 3/4 tsp ground nutmeg
  • 3/4 tsp ground ginger
  • 1/2 tsp ground allspice
  • 1/8 tsp ground cloves
Directions
  1. Preheat the oven to 350 degrees F. Grease a 9x13 baking dish.
  2. To make the streusel: In a small bowl, mix the flour, brown sugar, and spices. Drizzle in the canola oil and mix until crumb form. Add the pecans and mix.
  3. To make the cake: In a large bowl, mix the pumpkin, milk, oil, sugar, molasses, and vanilla. In a medium bowl, sift the flour, baking powder, salt and spices. Add the flour mixture (dry ingredients) to the pumpkin mixture (wet ingredients) and stir to combine. Do not overmix. Pour the batter into the prepared baking pan. Scatter the streusel evenly on top. Bake for 45-50 min, or until a toothpick inserted into the center comes out clean.
Not only is the cake moist and delicious, but the streusel topping is amazing! Enjoy!

Sunday, January 16, 2011

Veganomicon: Smoky Grilled Tempeh

On the weekends, David LOVES to grill! Since I've been in this "I don't feel like eating meat" mood, I decided to start browsing through Veganomicon to figure out what kind of interesting food David could grill for me. Ah-ha! Tempeh! Shannon introduced this food to me when she came to visit for new year's.

For those of you who don't know what tempeh is, it is similar to tofu, but made of whole soybeans and has a much firmer texture. Most vegans would describe tempeh as "meaty" and "nutty."

Check out these websites to get a better idea about tempeh:
Cooking with Tempeh -Vegan Coach
"Tempeh" -Wikipedia
What is Tempeh? -Soya

I found a great recipe: Smoky Grilled Tempeh. Thank you Isa and Terry (the fabulous authors of Veganomicon)!!

I wrote the recipe the way I made this dish, which may be slightly different in comparison to the original recipe.

Smoky Grilled Tempeh

Ingredients
  • 1 (8-oz) pkg tempeh
  • 3/4 cup vegetable broth
  • 2 tbsp soy sauce
  • 2 tbsp apple cider vinegar
  • 2 tbsp liquid smoke, hickory flavor
  • 2 tbsp olive oil
  • 2 tsp pure maple syrup
  • 2 cloves garlic, minced
Directions
  1. Whisk all of the marinade ingredients in a bowl. Set aside.
  2. Cut the tempeh in half, widthwise, then cut each half diagonally to make 4 large triangles.
  3. Bring a pot of water to boil. When the water is boiling, lower the heat to a simmer, add the tempeh, and cook for 10 minutes.
  4. Use tongs to place the tempeh in an 8x8 Pyrex dish. Pour the marinade over the tempeh. Marinate for 1 hour. Flip the tempeh occasionally to allow all sides to evenly marinate.
  5. To grill: Grease a piece of tinfoil and lay it down on the grates of the grill. Place the tempeh on the tinfoil and grill each side for 5 minutes.
This dish was really good. The only issue I had was boiling the tempeh before marinating. You are supposed to boil or steam tempeh prior to marinating to remove the bitterness tempeh tends to have. It also helps allow the tempeh to soak up the flavors more when marinating. So for this recipe, I let the tempeh simmer for 10 minutes in water and unfortunately I have a pain-in-the-butt stove. The burners are a little screwy, so I don't think the tempeh sat in the water long enough for the steam to take away all of its bitterness. The tempeh was still a little bitter after grilling, but I will say, the marinade was delicious! What wonderful flavors! Next time I make this I think I will steam the tempeh for 10-15 minutes prior to marinating. I don't trust my stove!

Friday, January 14, 2011

Thai Coconut Curry Loaded-Veggie Soup

Okay so any time I make a vegetable soup, I tend to go a little overboard with the veggies... okay, fine, A LOT overboard! I can't help myself though, I LOVE VEGGIES! And I love to cook in large amounts. I can split it up into many individual portions and freeze them! This allows me to be able to have prepared dinners on those busy school days or when I'm clueless of what to make for dinner.

So here we go, a 22-ingredient soup I put together after David's mom gave me a carton of Thai Coconut Curry broth and asked me to do something with it. Happy to take on the challenge, I began brainstorming... I glanced through a few possible recipes and then found a vegetable soup recipe on the back of the broth carton which I started to follow, but in the end, I came up with my own thing. Enjoy!

Ingredients
  • 2-4 tbsp olive oil
  • 5 cloves garlic, minced
  • 1 large onion, chopped
  • 1 (32-oz) carton College Inn Culinary Broth: Thai Coconut Curry
  • 1/2 red bell pepper, chopped
  • 1 green bell pepper, chopped
  • 1 cup cauliflower, chopped
  • 1 cup broccoli, chopped
  • 1 cup sugar snap peas
  • 1 (15-oz) can organic soy beans, drained and rinsed
  • 1 (15-oz) can organic garbanzo beans, drained and rinsed
  • 1 large zucchini, diced
  • 1 medium yellow squash, diced
  • 2 medium carrots, diced
  • 2 cups asparagus, chopped
  • 2 (15-oz) cans diced tomatoes, with juice
  • juice of 1 lime
  • 2 tsp fresh ginger, grated
  • 1 tsp curry powder
  • 1/4 tsp cayenne pepper
  • 1 (14-oz) pkg extra-firm tofu, diced
  • 1-1/2 cups light coconut milk
Directions
  1. Heat oil  in a dutch oven and saute garlic and onion for 3-4 minutes.
  2. Add the broth to the pot, followed by the bell peppers, cauliflower, broccoli, sugar snap peas, beans, zucchini, squash, carrots, asparagus, diced tomatoes, and lime juice. Stir to combine.
  3. Add the ginger, curry powder, and cayenne pepper. Stir to combine.
  4. Add the tofu and gently stir into the soup.
  5. Bring soup to a boil, then reduce to a simmer. Add the coconut milk and stir to combine. Simmer for 1 to 1-1/2 hours.

Thursday, January 13, 2011

Vegan Eggplant Bake

After a great dinner of vegan lasagna with my fabulous vegan friends, I decided to branch out a bit more and come up with some kind of eggplant parmesan dish. Here we have it, a vegan eggplant bake! This was very similar to the lasagna I made. The only changes I made were: eggplant instead of lasagna noodles, a slightly different marinara sauce, a new tofu filling (thanks to Veganomicon), different veggies in the stir-fry layer, and finally, the addition of veggie cheese (unfortunately the cheese I used contains a couple of products that make it vegan-UNfriendly, but there is vegan cheese available out there!).

Vegan Eggplant Bake

A colorful, layered bake very similar to eggplant parmesan, only better!

Ingredients
  
For the marinara sauce, modified from Veganomicon:
  • 1/4 cup olive oil
  • 2 small onions, chopped
  • 3 cloves garlic, minced
  • 1/3 cup red wine
  • 3 (15-oz) cans diced tomatoes, with juice
  • 1 (6-oz) can tomato paste
  • dried parsley
  • dried basil
  • dried oregano
  • salt 
For the filling, Tofu Ricotta from Veganomicon:

  • 1 lb extra-firm tofu
  • 2 tsp lemon juice
  • 1 clove garlic, minced
  • 1/4 tsp salt
  • Pinch of ground black pepper
  • 1/2 tsp dried basil
  • 2 tsp olive oil
  • 1/4 cup nutritional yeast flakes 
For the veggie layer:
  • olive oil
  • 1 pkg soybeans, shelled
  • 2 carrots, diced
  • 1 zucchini, diced
  • 1 yellow squash, diced
  • 1 green bell pepper, chopped
  • garlic powder
  • onion powder
  • salt
  • ground black pepper
Other:
  • 1 medium eggplant
  • sea salt
  • olive oil
  • 1 package (12 slices) veggie cheese, mozzarella flavor
  • 1/4-1/2 cup grated veggie cheese, parmesan flavor 
Directions:
  1. Prepare the marinara sauce: Combine the olive oil, garlic, and onion in a saucepan. Heat over medium heat and cook for 3-4 minutes. Add the wine and simmer for 3 minutes. Add the diced tomatoes, tomato paste, and spices. Simmer on low for at least 15 minutes, or until ready to use.
  2. Prepare the tofu ricotta: In a large bowl, mush the tofu until crumbly. Add the lemon juice, garlic, salt, pepper, and basil. Mix/mush until consistancy of ricotta cheese, 2-5 min. Add the olive oil, stir with a fork. Add the nutritional yeast and mix together all of the ingredients with a fork. Cover and refrigerate until ready to use.
  3. Roast the eggplant: Preheat the oven to 425 degrees F. Grease a baking sheet. Slice the eggplant into 1/4-1/2 inch thick rounds. Place rounds on the baking sheet and salt and brush olive oil on both sides of each slice. Bake for 10 minutes. Flip eggplant over and bake for another 5-10 minutes longer. While the eggplant is roasting, make the veggie layer. When the eggplant is ready, remove from oven and set aside until ready to use.
  4. To make the veggie layer: Heat olive oil in a large skillet. Add soybeans, carrots, zucchini, squash, and bell pepper. Season with garlic powder, onion powder, salt and black pepper, to taste. Cook until vegetables become tender. Set aside until ready to use.
  5. To make the eggplant bake: Preheat oven to 350 degrees F. Grease a 9x13 Pyrex dish. Place about 1 cup marinara sauce in the bottom of the dish. Place half of the eggplant rounds on top. Layer with half of the tofu ricotta filling, then half of the stir-fry veggies, and then 6 slices of mozzarella cheese. Sprinkle with parmesan cheese. Pour half of the remaining marinara on top. Top with the remaining eggplant, tofu ricotta, veggies, and sprinkle with parmesan cheese (omit the mozzarella on this one). Top with the rest of the marinara sauce, 6 slices of mozzarella cheese, and parmesan cheese. Cover with tinfoil and bake 50-60 min. Remove from oven and lift one end of the tinfoil to allow the bake to release steam. Let rest for at least 10 minutes before serving.
This eggplant bake was DELISH! The tofu ricotta was wonderful! To all you non-vegans, it tasted nothing like tofu! The dish was very flavorful and I have plenty for later! I was able to divide up this dish and freeze it in single servings! Perfect on those late school nights! Enjoy!

Wednesday, January 12, 2011

Vegan Cheese Sauce

In the past few years I've never been one to eat cream or cheese sauces because of the amount of calories in them, BUT when I saw "cheezy sauce" in Veganomicon, I just have to try it! Ok, thank you Shannon for warning me, and fair warning to everyone else, but this doesn't exactly taste like cheese. It is similar and has a great creamy consistancy though. Oh! And it is very flavorful! I drizzled the "cheese" sauce over steamed veggies, which was yummy!

I had also made black bean burgers that night and got a little daring... I decided to dip my black bean burger into the "cheese" sauce.... AMAZING! I'm not sure why I loved it so much but both the burger and sauce went perfect together. This combo is a must and I will definitely do it again!

Cheezy Sauce (Source: Veganomicon)

Ingredients
  • 2 cups vegetable broth
  • 1/4 cup all-purpose flour
  • 1 tbsp olive oil
  • 3 cloves garlic, minced
  • A pinch of dried thyme
  • 1/4 tsp salt
  • Ground black pepper
  • 1/8 tsp turmeric
  • 3/4 cup nutritional yeast flakes
  • 1 tbsp fresh lemon juice
  • 1 tsp prepared yellow mustard
Directions
  1. Combine the broth and flour in a small bowl and whisk with a fork until dissolved.
  2. Heat the oil and garlic in a saucepan over medium-low heat, cooking for 2 minutes.
  3. Add the thyme, salt, and pepper, and cook for about 15 seconds.
  4. Add the broth, turmeric, and nutritional yeast, and raise the heat to medium. Stir constantly with a whisk. The mixture should bubble and thicken within 3 minutes.
  5. Once the mixture is bubbling and thickening, stir and cook for about 2 minutes.
  6. Add the lemon juice and mustard, and stir to combine.
  7. Turn off the heat and cover the saucepan to keep warm until ready to use.
  8. Yields ~3 cups.