Pages

Monday, November 29, 2010

Mmmm comfort food: Delicious chili with freshly baked sweet cornbread!

This is very easy to make and just because it’s a comfort food doesn’t mean it has to be bad for you :) Chili has so many variations these days! I wanted to share mine with you - it’s pretty basic, but we love it! The jalapeƱos give this chili a nice little spicy kick to it, but is the perfect amount of spice for those who don’t like really spicy foods. AND it goes wonderfully with homemade sweet cornbread (David’s favorite!).

Below is the recipe for my chili. I used four kinds of beans this time: Northern, black, dark kidney, and light kidney. I change it up from time to time, but you can use any bean! I found a chili seasoning recipe a while back which works perfectly for the amount of chili I cook. In the past, I was always using McCormick’s Chili seasoning mix, but I realized it was a waste of money since I had all of the spices I needed right in my cupboard! Better to be wise and make my own chili seasoning so that I can save a little money!

Rachel’s Chili

Ingredients

• 1 lb ground beef (preferably lean)
• 1 onion, chopped
• 2 (15-oz) cans diced tomatoes, with juice
• 3-4 (15-oz) cans beans (any variety), with juice
• 1-2 bell peppers, chopped
• 1-2 zucchinis, diced (optional)
• 1 jalepeƱo, sliced or chopped (pickled or fresh)
• Chili seasoning (see recipe below)
• Cheddar cheese, shredded (optional)
• Sour cream (optional)

Directions

1. Cook ground beef and onion in a large skillet on medium-high heat until browned. Drain any excess grease.
2. Add tomatoes, beans, bell pepper, and zucchini. Stir to combine.
3. Add chili seasoning. Stir to combine.
4. Bring chili to a boil. Cover skillet and reduce to a simmer for 20-30 minutes.
5. Serve chili in a bowl and top with shredded cheese and a dollop of sour cream.

Chili Seasoning

• 2 tablespoons chili powder
• 2 teaspoons ground cumin
• 1 ½ teaspoons garlic salt
• ½ teaspoon dried oregano

Now for the best part: the cornbread! This is a recipe for a sweet cornbread, which goes wonderfully with the chili! David prefers the sweet cornbread over the not-so-sweet kind :) This recipe has a limited amount of oil and margarine in it, so it’s not TOO terribly unhealthy. I also used nonfat milk. You can also substitute the all purpose flour with whole wheat flour, which can make it a little healthier (I have done this in the past). It is delicious either way!
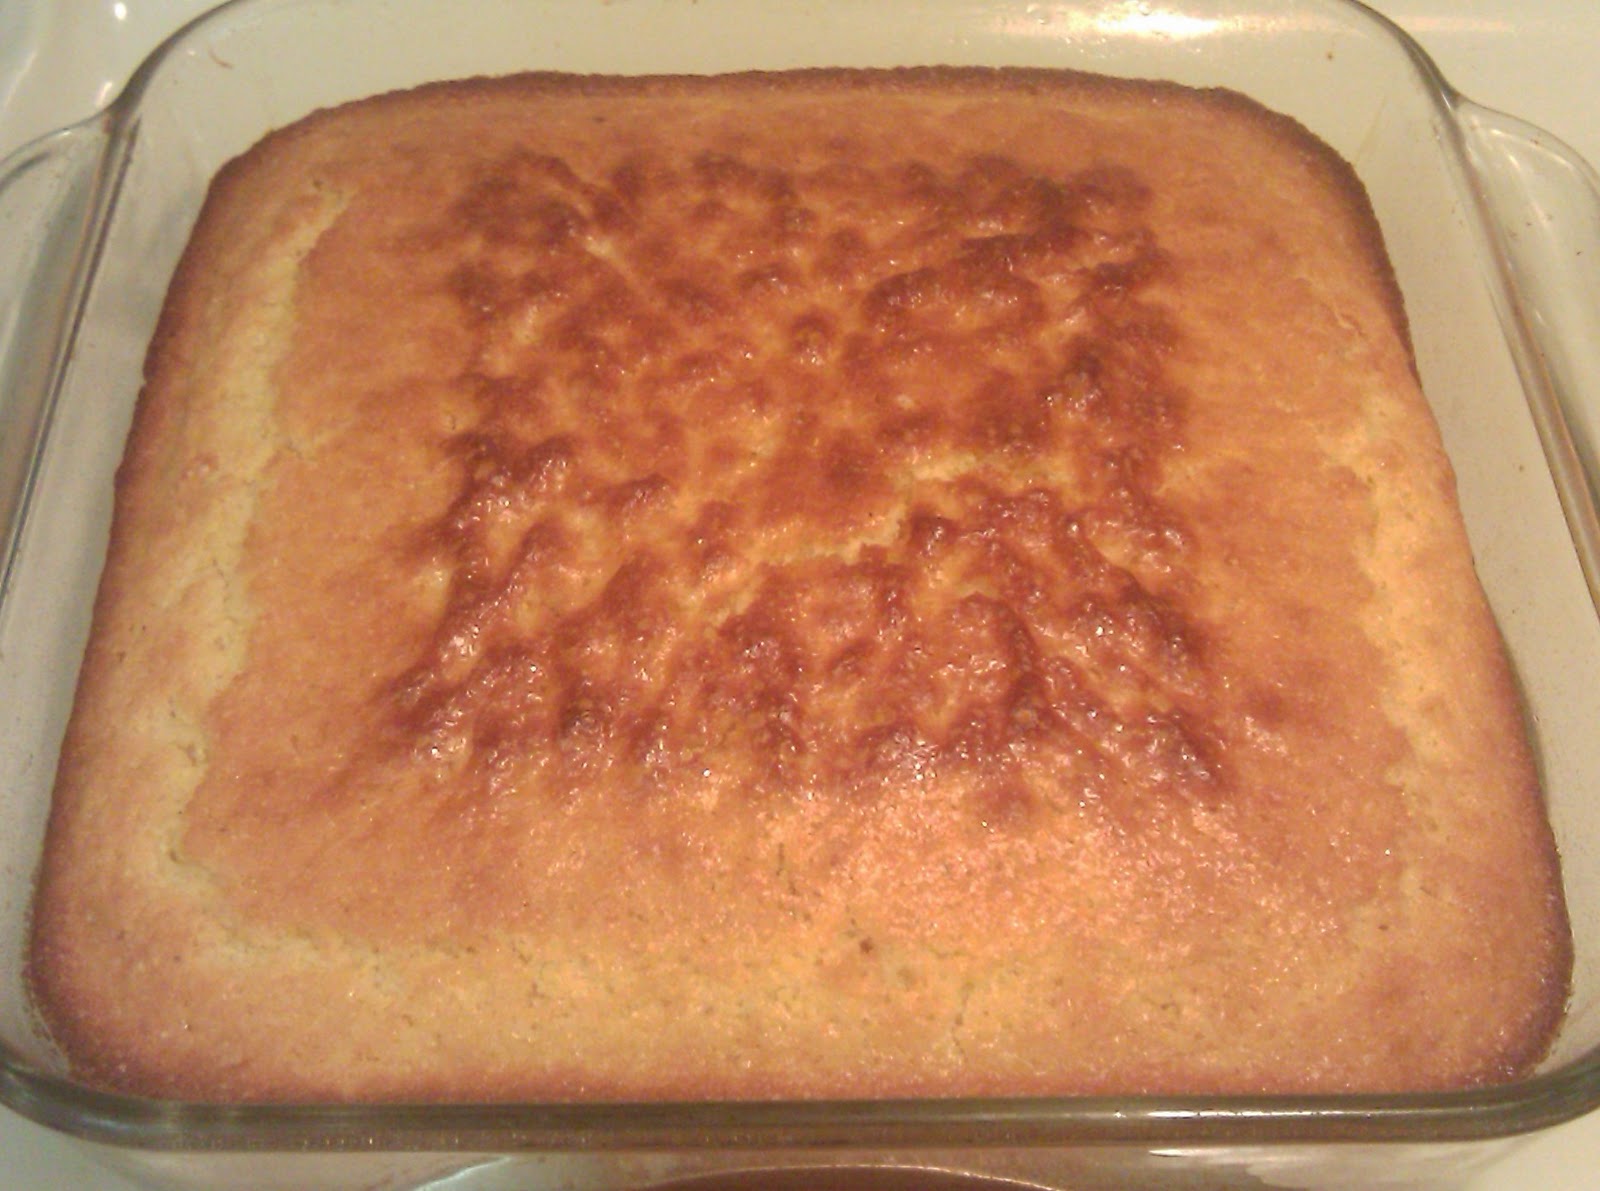
Sweet Cornbread

Ingredients

• 1 ½ cups flour
• ⅔ cup sugar
• ½ cup cornmeal
• 1 tablespoon baking powder
• ½ teaspoon salt
• 1 ¼ cups milk
• 2 eggs, lightly beaten
• ⅓ cup oil
• 3 tablespoons butter or margarine, melted
• 1 tablespoon honey (optional)

Directions

1. Preheat oven to 350 degrees. Grease an 8x8 baking pan.
2. Combine flour, sugar, cornmeal, baking powder, and salt in medium bowl.
3. Combine milk, eggs, oil, butter, and honey in small bowl and mix well. Add to flour mix and stir until blended.
4. Pour into baking pan. Bake 35 minutes or until toothpick inserted comes out clean.


Happy Thanksgiving!

I hope everyone had a wonderful Thanksgiving! David and I spent the holiday in Buffalo, NY with family. It was good to see everyone and the food, as always, was amazing! I hate to brag, but my family really knows how to put together a wonderful Thanksgiving meal!

Along with the our thanksgiving meal, we were able to visit a few popular places: Niagara Falls, Wegmans, Watson's, and Duff's!

More recipes will be added soon now that I'm back in town! Keep posted!

~ Rachel ~

Wednesday, November 24, 2010

The holidays are just around the corner!

Is it really that time already?? My favorite time!! I just love it! It gives me an excuse to bake more! And it’s always a perfect gift!

I recently had a special request from Bryan. For those of you who don’t know who Bryan is, he is my future brother-in-law (hahaha), my sister Michelle’s boyfriend :) He loves peppermint bark, so about a week ago he kindly asked if I would make him some. Of course!

I created my own double boiler to melt the chocolate by setting a Pyrex bowl over a pot filled with a little water. This method works great! Just boil the water in the pot and the steam slowly melts the chocolate.

Here is how I made the peppermint bark:

Ingredients

• 11.5 oz bag Ghiradelli’s milk chocolate chips
• 11.5 oz bag Ghiradelli’s white chocolate chips
• 1 box candy canes (12 candy canes), crushed, and divided
• ½ - 1 teaspoon peppermint extract, divided

Directions:

1. Layer a 9x13 casserole dish with wax paper.
2. Melt the milk chocolate chips in a double boiler. Add ¼ - ½ tsp peppermint extract and ⅓ of the crushed candied canes. Stir to combine.
3. Pour the milk chocolate mix onto the wax paper. Shake the dish back and forth to spread out the chocolate evenly.
4. Melt the white chocolate chips in a double boiler. Add ¼ - ½ tsp peppermint extract and ⅓ of the crushed candied canes. Stir to combine.
5. Pour the white chocolate mix over the milk chocolate mix. Shake the dish back and forth to even out the layers.
6. Run a knife through the chocolate in all different directions to swirl the white and milk chocolate mixtures together. Shake the dish back and forth again to even out the layers.
7. Sprinkle the remaining ⅓ of the crushed candy canes over the melted chocolate.

Tuesday, November 23, 2010

Au Gratin Potatoes: Prepped, Cooked, and Baked by Meagan and Rachel!

So I had this huge bag of potatoes just sitting in my fridge. Thinking of what to do with them, I had been browsing through Allrecipes and found the recipe, “Creamy Au Gratin Potatoes.” Normally, I try to stay away from the creamy dishes, but this was something I always wanted to try and I knew David would love it because, well, it contains a lot of CHEESE. Perfect! I found something exciting to do with all the potatoes!

My friend Meagan, a grad student who works in my lab (well, one of the labs I work in), was coming over for dinner and I knew Au Gratin potatoes would go really well with our dinner: grilled, barbeque chicken and grilled veggies (tossed with olive oil and a special seasoning, “Bone Suckin’ Sauce”)! And of course I must give a big thank you to David for grilling! He may not always be the best in the kitchen (shall we say a little accident-prone?), but he was definitely born to grill!

I sliced 5 Idaho potatoes (small to medium size) with a mandolin, while Meagan cooked the cheese sauce. The sliced potatoes were placed into a casserole dish with some seasonings (onion powder, salt and pepper). To make this dish a bit healthier, the sauce consisted of nonfat milk and reduced fat cheddar cheese, as well as a limited amount of flour and margarine. When the sauce became thick and ready, it was poured over the potatoes. The dish was covered with tinfoil and baked at a high temperature for roughly an hour and a half (long time, right?). Oh boy were our bellies growling as the time slowly passed and the kitchen filling with a wonderful aroma!

The potatoes were definitely worth waiting for! They were delicious! Thank you Meagan for all your help!


Enjoy!

Monday, November 22, 2010

Vegan Meatballs!

Okay Shannon – I did it! My first time making vegan meatballs! And again, I note, this is my first time :)

Just to fill you all in, my friend Shannon is vegan and I am always getting tips and recipes from her! You can check out some of her tips and recipes at The Road Less Traveled. I really love trying new recipes and how you can be so creative when it comes to making vegan foods. Not to mention, it’s also quite healthier :)

I recently had asked Shannon for a vegan meatball recipe. So she gave me a choice between a tofu/fake sausage meatball recipe and a lentil meatball recipe. I decided to go with the tofu one, and as you can see, my meatballs turned out quite lovely. I modified the recipe a little bit to suit my own taste buds, but unfortunately as soon as I put them into my marinara sauce, they did not hold together very well. Okay, so I was a little off on the consistency of the meatballs. Instead of adding bread crumbs, I had decided to go with oats, which may have played a part in this problem. And my other issue – the taste was off. I don’t think I added enough flavor to my meatballs, and unfortunately, I found out that I don’t care for fake sausage. So how about some advice to make these meatballs better? More flavors? Omitting the sausage? Getting the right consistency? I will not give up!

All though this is not my best, I wanted to share this recipe with you. Cooking is always a learning process and I definitely want to learn how to make this recipe better. Suggestions are welcome!

Here are the ingredients I used to make these meatballs. Shannon, I would love any help/tips/advice to point me in the right direction to make these meatballs tastier!

• 1 package extra firm tofu, drained
• 1 Gimme lean sausage
• ½ cup walnuts, finely chopped
• 1 onion, finely chopped
• ½ cup oats (generous amount)
• ¼ cup grated Veggie Cheese (parmesan flavor)
• 4-5 garlic cloves, minced
• Spices: basil, Italian seasoning, salt, pepper

All of the ingredients were mixed together (using my hands Shannon!) and formed into generous 1” balls. The meatballs were placed on a greased baking pan and baked at 400 degrees for 15 minutes.

I served the meatballs and marinara sauce over sautĆ©ed, julienned squash and zucchini. I have been on a kick these days replacing pasta with veggies. I got this idea from Teresa Giudice’s (from the Real Housewives of New Jersey) cookbook, “Skinny Italian.” I love it! I then topped the sauce and meatballs with a generous amount of veggie cheese (parmesan flavor) and chopped, fresh basil leaves.

Monday, November 15, 2010

Giada’s Chicken Cacciatore

Giada De Laurentiis is one of my top favorite food network chefs! She had very high ratings for her chicken cacciatore, so I gave it a shot! I took Giada’s recipe as the base and changed it up as I pleased.

Giada’s Recipe:

Ingredients

• 4 chicken thighs
• 2 chicken breasts with skin and backbone, halved crosswise
• 2 teaspoons salt, plus more to taste
• 1 teaspoon freshly ground black pepper, plus more to taste
• 1/2 cup all purpose flour, for dredging
• 3 tablespoons olive oil
• 1 large red bell pepper, chopped
• 1 onion, chopped
• 3 garlic cloves, finely chopped
• 3/4 cup dry white wine
• 1 ( 28-ounce) can diced tomatoes with juice
• 3/4 cup reduced-sodium chicken broth
• 3 tablespoons drained capers
• 1 1/2 teaspoons dried oregano leaves
• 1/4 cup coarsely chopped fresh basil leaves

Directions

1. Sprinkle the chicken pieces with 1 teaspoon of each salt and pepper. Dredge the chicken pieces in the flour to coat lightly.

2. In a large heavy saute pan, heat the oil over a medium-high flame. Add the chicken pieces to the pan and saute just until brown, about 5 minutes per side. If all the chicken does not fit in the pan, saute it in 2 batches. Transfer the chicken to a plate and set aside. Add the bell pepper, onion and garlic to the same pan and saute over medium heat until the onion is tender, about 5 minutes. Season with salt and pepper. Add the wine and simmer until reduced by half, about 3 minutes. Add the tomatoes with their juice, broth, capers and oregano. Return the chicken pieces to the pan and turn them to coat in the sauce. Bring the sauce to a simmer. Continue simmering over medium-low heat until the chicken is just cooked through, about 30 minutes for the breast pieces, and 20 minutes for the thighs.

3. Using tongs, transfer the chicken to a platter. If necessary, boil the sauce until it thickens slightly, about 3 minutes. Spoon off any excess fat from atop the sauce. Spoon the sauce over the chicken, then sprinkle with the basil and serve.

I made the following changes:

Instead of using bone-in chicken, I used 4 boneless, skinless chicken breasts and cut them into bite size pieces. David and I don’t really care for the dark meat, so we like to stick to breasts! I decided to keep this dish healthy so I stir-fryed the chicken using cooking spray and lightly seasoned them with salt and pepper. I did not coat the chicken in flour to keep this on the lighter side.

I went a little crazy with the veggies by adding red bell pepper, green bell pepper, onion, asparagus, green beans, zucchini, squash, and carrots! Geez-oh-man, I love veggies!

I chose Riesling for the white wine (I happened to have some in the fridge) and used about a cup of it. I added 1 cup of chicken broth and 2 cans of diced tomatoes with juice to keep the veggies and chicken immersed in enough liquid. Obviously I was using WAY more than what Giada’s recipe was calling for!

The capers were omitted, I never really cared for them. I added fresh garlic, dried oregano, parley, and basil.

Once dinner was ready, the chicken cacciatore was topped with parmesan cheese (I used the Veggie Cheese) and freshly chopped basil! This was a wonderful dish.

I had planned on cooking pasta on the side, but completely forgot about it and remembered the morning after. Where is my head? Haha. Needless to say, the dish was still great without the pasta. The sauce was delicious! Thanks Giada!

A special request: Chocolate chip muffins

I am always open for requests! Any thoughts, ideas, suggestions, requests, I would love to hear!

This time the request was simply chocolate chip muffins. I found a basic recipe that worked out great! I really think you can make many variations with this kind of muffin recipe. Just play around with it using different flavors and add-ins! The chocolate chip muffins turned out nicely and made our townhome smell lovely! I love to sprinkle raw sugar cane crystals over the top of the batter before popping the pan in the oven. This creates a hardened, sweet top – yum, yum, yum!

If you want to see the original recipe: http://allrecipes.com/Recipe/Chocolate-Chip-Muffins/Detail.aspx

Here is the recipe with the few alterations I made:

Chocolate Chip Muffins

Ingredients

• 2 cups all-purpose flour
• 1 cup white sugar
• 3 teaspoons baking powder
• 1/2 teaspoon salt
• 1 cup milk
• 1/2 cup vegetable oil
• 1 tsp vanilla
• 1 egg
• 1 cup mini semi-sweet chocolate chips
• Raw sugar cane crystals (Demerara Sugar)

Directions

1. Heat oven to 350 degrees F. Grease bottoms of 12 muffin cups or line with baking cups.

2. In a medium bowl, combine flour, 1 cup sugar, baking powder, chocolate chips, and salt; mix well. In a small bowl, combine milk, oil, vanilla and egg; blend well. Add dry ingredients all at once; stir just until dry ingredients are moistened (batter will be lumpy.)

3. Fill cups. Sprinkle tops of muffins before baking with raw sugar.

4. Bake for 20 to 25 minutes or until toothpick inserted in center comes out clean. Cool 1 minute before removing from pan. Serve warm.


A different kind of pumpkin dessert! Perfect for the holidays!

 I didn’t realize how delicious this recipe actually would be. There were good reviews on www.allrecipes.com, but some of them threw me off a little, such as “this is better the day after…” I would recommend this pumpkin dessert to everybody, especially those who do not like traditional pies (ME!). AND I recommend eating the dessert just after it cools! It is so, so good :)

This dessert is made up of three layers. The bottom layer is yellow cake mix from a box, but you end up forming dough out of it and pushing it into the bottom of the pan. It is just a denser version of the actually cake. The next layer is a delicious pumpkin filling. I followed the recipe to the tee for this part! Finally, the top layer is a combination of reserved cake mix, butter, sugar, and walnuts. Yum! The recipe calls for white sugar but I decided to use the raw sugar cane crystals (Demerara). I used a little more sugar than what was called for (~ ¾ cup) and I threw the top layer ingredients into a food processor. Of course not reading the directions entirely, I added the chopped nuts to the food processor with the rest of the ingredients, so the walnuts ended up being crushed further. OOPS! I decided to keeping going though and sprinkled the mixture on top. It ended up being the best part of the dessert!

If you want to check out the recipe: http://allrecipes.com/Recipe/Pumpkin-Dessert/Detail.aspx

Enjoy!


Lucky for David's work! All leftovers were sent to work
with him or else we would have eaten the entire thing
(that's what happens when you have a big, bad sweet tooth)!

Frozen Doggy Treats a.k.a. ice cream for your puppy-dog: an exciting (and even healthy) snack.


Just a few simple ingredients!
Your dog will love you!
Oh yes, anything to make my little Bella happy :)

David’s mom sent me a link a few months back on different recipes for dogs. I just had to try this recipe as soon as I saw it! It is simply a mixture of plain yogurt, banana, peanut butter, and honey that you freeze. The best way to freeze this is in ice cube trays – perfectly portioned! As you can tell from the pictures, Bella really enjoyed this!

The recipe...


• 1 tablespoons honey
• 3 tablespoons peanut butter
• 1 ripe banana
• 16 ounces plain yogurt

Mix the peanut butter, honey, and fruit together until well blended—mash with a fork or use the blender. Add the fruit mixture to the yogurt and mix well. Freeze in ice cube trays. Crack trays and release treats as needed!


Bella with her 3 best friends: Piddles, Jay-Jay, and Chester!

Friday, November 12, 2010

Homemade Meatballs!


So I have been promising David that I would make meatballs and marinara sauce for months now. Usually I just make a meat marinara sauce, but I changed it up this time. I finally made the meatballs! Yay!


They were definitely tasty. Here is the recipe if anyone would like to try them! The only changes I made were I baked my meatballs at 400 oF for 15 minutes and then tossed them in the simmering marinara sauce for about 45 minutes to an hour. I guess the only changes I would make for next time is to use less bread crumbs. Don’t get me wrong, these were delicious, but I prefer a “meatier” meatball. It seemed like there was just a tad too much “filler” for me. Picky picky, I know :) Oh, and the other thing – the recipe gives a yield of 12 meatballs – I only got 9 out of it. Go figure!

Ingredients

• 1 pound lean ground beef
• 1 cup fresh bread crumbs
• 1 tablespoon dried parsley
• 1 tablespoon grated Parmesan cheese
• 1/4 teaspoon ground black pepper
• 1/8 teaspoon garlic powder
• 1 egg, beaten

Directions

1. In a large bowl, combine ground beef, bread crumbs, parsley, Parmesan, 1/4 teaspoon black pepper, garlic powder and beaten egg. Mix well and form into 12 balls.

Now, I actually used a different recipe for the sauce. This is a sauce I normally use for my meat marinara sauce, as well as lasagna! Of course, I got this recipe from www.allrecipes.com, but I would recommend this sauce for only a meat marinara sauce. This recipe is so delicious, but I just don’t think it fits as well when meatballs are in the picture. There are a lot of spices in this recipe, so I don’t think you appreciate the flavors as much unless you have meat mixed in with it.

Here is the link if anyone wants it:

http://allrecipes.com/Recipe/Worlds-Best-Pasta-Sauce/Detail.aspx

So David and I are a little different when it comes to eating our meatballs and marinara sauce! Here, you see, I made rigatoni for David, which he then topped with the lovely sauce and parmesan cheese. I like to eat mine without pasta. Weird, right?! Instead, I julienne squash, zucchini, or whatever kind of veggies I happen to be in the mood for and then sautĆ© them in olive oil, salt, pepper, and a bit of garlic powder. I pile on the meatballs and marinara sauce and top it with chopped fresh basil and parmesan cheese. Actually lately I have started eating Veggie Parmesan Cheese – it tastes the same as the regular stuff but doesn’t have all the fat in it :) Needless to say, both of our plates were delish!

Sunday, November 7, 2010

Stay in Bed Stew: Perfect on a Cold Day!

It’s finally cooling off down here in Florida! All though, next week will most likely bring warm weather! It’s a little difficult to get used to the weather since the temperatures fluctuate so much! So, for now, this meal is perfect to keep us Floridians warm!! Oh how I miss all four seasons though!

Now, as my mom always says, this recipe is great because you throw all the ingredients in a big pot (a.k.a. Dutch oven), stick it in the oven, and walk away (for a good 5 hours)! The smell is wonderful!

Now for those who have no clue what "stay in bed" stew is, it is a delicious, hearty beef stew with potatoes, carrots, onions, green beans, and peas that cook in a sauce of tomato soup and cream of mushroom soup. To make the stew a little juicier, a can of diced tomatoes are added to the mix. Yum!

Of course this is well worth the 5-hour wait! The stew was yummy as ever! The dumplings (thanks to Bisquick) pair perfectly with the stew because they soak up all of the juice! Delish!!

Thursday, November 4, 2010

Meet Avi, our avacado tree :)

I've been in the mood to grow something, so I decided it would be best to try to start an avacado tree! I lucked out and happened to open an avacado that had already started growing. As you can see, I was making guacamole that day :) 

I decided to see what would happen if I tried to grow it. For about 2 weeks, the avacado sat in a plastic cup with water, slowing sprouting out the top and bottom.

 Now I will have to say, I wasn't the best at watering little Avi daily so I gladly handed my job over to David! He takes such great care of Avi! We have had to re-pot him 3 times because he just keeps growing and growing! I'll keep everyone updated :)

Wednesday, November 3, 2010

Happy Halloween!

I don't think this dessert could be a more perfect name for a Halloween party. Death by Chocolate! The best trifle EVER. I got this recipe from my Bubby (grandmother) and boy does she know her desserts! She left so many great recipes to remember her by! Love you Bubs!

Now the first time I ever learned to make this was from my sister Michelle though. I watched, while she put everything together. I was drooling the whole time! Thanks for showing me Mishkie!! Layered with brownies soaked in Kahlua, chocolate mousse, crushed heath bars, and cool whip, you can't go wrong with this! And it's perfect for a party! It was definitely a hit at the Halloween party :) Oh, and FYI, the spiders are plastic :)

Raisin Challah

There is just something about homemade baked goods that brings a smile to my face! I love it! This is a recipe I found on dianasdesserts.com. The bread is AMAZING, especially when it's still warm from baking in the oven. The more raisins, the better - but if you ask my dad, raisins are expensive, so no challah for Dad (just kidding because he loves it so much!). The dough can be turned into one gigantic challah, 2 large ones, or 4 minis! Sometimes I form the bread into a crown, rather than braid it. It's fabulous either way! This freezes really well and is also so delicious when you use this for French toast! Yummy!!

Here's the recipe: "Sweet Honey-Raisin Challah in Diana's Recipe Book"
(Use the website for tips)

 
Ingredients: 
  • 1 tsp. granulated sugar
  • 1 1/2 cups warm water 
  • 2 packages (1/2 oz./4 1/2 tsp./14g) instant yeast or bread yeast 
  • 7 to 8 cups bread flour (approximately) 
  • 1/8 tsp. powdered saffron or a pinch of saffron threads (optional) 
  • 2 tsp. salt 
  • 1/4 cup honey 
  • 1/3 cup granulated sugar 
  • 1/2 cup (4 oz./8 tbsp./113g) butter or margarine, melted (or 1/2 cup vegetable oil may be used) 
  • 3 whole eggs 
  • 2 egg yolks 
  • 1 1/4 cups golden raisins, plumped 
  •  Egg Wash: 1 egg yolk, lightly beaten and mixed with 1 tsp. sugar and 1 tbsp. water  
Directions: 
  1. In a large mixing bowl, stir the 1 tsp. sugar into the 1 1/2 cups warm water. Sprinkle in yeast and stir well; let stand until frothy or foamy, about 10 minutes.  
  2. Using a wooden spoon, stir in 7 cups of the flour, saffron (if using) and salt. Add honey, the 1/3 cup sugar, melted butter (or vegetable oil or melted margarine, if using), whole eggs and egg yolks; stir until dough forms.  
  3. Turn dough out onto lightly floured work surface; knead until smooth and elastic, about 10 minutes, adding enough of the remaining 1 cup flour as necessary to prevent sticking (you may need to add more flour if your dough is still too sticky. Add in one tablspoon at a time until the dough is cohesive). Place dough in a greased glass or ceramic bowl, turning to grease dough all over. Cover bowl with greased plastic wrap or a warm damp kitchen towel; let dough rise in warm draft-free place until doubled in size and indentation remains when dough is poked with 2 fingers, about one hour or so. Punch down dough, transfer dough to work surface, let rest for 10 minutes, then knead in raisins (if using).  
  4. To Make Round Crown Loaf: Roll out dough into a 30-inch (76 cm) long rope. Holding one end in place, wind remaining rope around end to form a fairly tight spiral that is slightly higher in the center of dough. Transfer dough to a greased rimmed baking sheet.  
  5. To Make a 4 rope Braided Loaf: Divide dough into quarters; roll each quarter into 18-inch (45 cm) long ropes. Place side by side on a greased rimmed baking sheet; pinch ropes together at one end. Starting at pinched end, move second rope from left over rope on its right. Move far right rope over 2 ropes on left. Move far left rope over 2 ropes on right. Repeat until braid is complete; tuck ends under braid.  
  6. Cover crown loaf or braid loaf with plastic wrap or damp kitchen towel; let rise in warm draft-free place until doubled in size, about one hour.  
  7. Egg Wash:  Stir egg yolk with 1 tsp. sugar and 1 tbsp. water; brush over loaf (s).  
  8. Bake in center of 350°F/180°C oven until deep golden brown and loaf sounds hollow when tapped on bottom, 30 to 35 minutes. Let cool on rack for 15 minutes before slicing.

Homemade Pizza!

This is one of our favorite meals to make! Homemade pizza! You can add whatever you like on it! I love to pile ours with lots of veggies (the more the better!) - bell pepper, freshly sliced tomato, sliced onion, green olives - and meats - turkey italian sausage and turkey pepperoni. The pizza sauce is a combination of tomato sauce and paste and I sprinkle it with garlic, italian spices, and especially fresh basil! The pizza is topped with generous amounts of mozzarella and parmesan!! Mmmm mmmm mmmm!

The pizza crust is homemade too - I use a combination of whole wheat flour and all-purpose flour to make this. Just to make this a little healthier! If anyone wants the recipe, just let me know, I need to go find it :)

What's so nice about this pizza too is it doesn't produce as much grease as most pizzas from pizza places! You will enjoy every bite!

Black Bean Veggie Dip

I took a stab at making my own bean dip. It turned out pretty good but I prefer white bean dip over this. I pureed tomatoes, garlic, basil, and a bit of olive oil with the black beans. If i were to make this again, my only change would be to make this a bit thicker - the juice from the tomatoes seemed to make it a little thinner than what I would have liked. This dip goes well with assorted veggies, especially carrots (my favorite!).

Vegetarian Chili

This is what you end up with when your ground beef, that’s been sitting in the fridge, goes bad! I have never cooked with the dry beans, so I decided to give it a shot. Ok, so my first attempt at using dry beans was not a good one but it doesn't mean I won't try again. The beans seemed to be a little undercooked. I boiled them for a good amount of time before making my chili, but unfortunately it was not long enough. I made enough for an army too! It was about 4 or 5 nights in a row that David and I ate chili - yum! Believe it or not we are not even sick of it. Ha!

I really didn't mind that there was no meat in this chili. There were so many different kinds of beans and vegetables, I loved it! David would tell you otherwise, but then again, he is a "steak and potato" kind of guy...

In the mood for something a little different

Delicious! Southern banana pudding a.k.a. Original NILLA banana pudding! Unfortunately I don't have a story to tell with this one, but it is one tasty dish :)


Here's the recipe from http://www.nabiscoworld.com/:

Ingredients:
  • 3/4 cup sugar, divided
  • 1/3 cup flour
  • Dash salt
  • 3 eggs, separated
  • 2 cups milk
  • 1/2 tsp. vanilla
  • 45 NILLA Wafers, divided
  • 5 bananas, sliced

 Directions: 
  1. MIX 1/2 cup sugar, flour and salt in top of double boiler. Blend in 3 egg yolks and milk. Cook, uncovered, over boiling water 10 to 12 min. or until thickened, stirring constantly. Remove from heat; stir in vanilla.
  2. RESERVE 12 wafers for garnish. Spread small amount of custard onto bottom of 1-1/2-qt. baking dish. Cover with layers of 1/3 each of the remaining wafers, bananas and remaining custard. Repeat layers 2 times.  
  3. BEAT egg whites on high speed of mixer until soft peaks form. Gradually beat in remaining sugar until stiff peaks form. Spread over custard, sealing well to edge of dish.
  4. BAKE 15 to 20 min. or until lightly browned. Cool slightly. Top with reserved wafers just before serving.


The Famous Banana Bread!!!

So far, this is the best banana bread recipe I have found. I should definitely thank a special chef from the Food Network though: Giada De Laurentiis!!
Banana Muffins (or Bread depending on the bakeware you use!):

 
Ingredients
  • 3 cups all-purpose flour
  • 1 teaspoon baking soda
  • 1 teaspoon salt
  • 1/2 teaspoon baking powder
  • 1/2 teaspoon ground cinnamon
  • 1/2 teaspoon ground nutmeg
  • 2 cups sugar
  • 1 cup vegetable oil
  • 3 large eggs
  • 1 tablespoon vanilla extract
  • 4 ripe bananas, peeled and coarsely mashed  
Directions
  1. Line 18 muffin cups with paper liners. Preheat the oven to 325 degrees F. 
  2. Whisk the flour, baking soda, salt, baking powder, cinnamon, and nutmeg in a medium bowl to blend. Beat the sugar, oil, eggs, and vanilla in a large bowl to blend. Stir in the banana. Add the dry ingredients and stir just until blended.
  3. Divide the batter among the prepared muffin cups. Bake the muffins on the middle rack until the tops are golden brown and a tester inserted into the center comes out with no crumbs attached, about 25 minutes. Transfer the muffins to a rack and cool slightly. The muffins may be eaten warm or cooled completely and frosted.
There are only a couple of changes I make to this recipe. First - the more cinnamon the better! I actually omit the nutmeg and probably use more than a tablespoon of cinnamon (I never measure). Second - before putting the batter in the oven, I lightly sprinkle the batter with raw sugar crystals (Demerara cane sugar). It is delicious!

Just call me Betty!


I just can't get enough of it! I love to bake! Everyday I question why I just don't open my own bakery - come on, it kind of relates to chemistry, right? Haha. I will just keep baking as a hobby for now... you never know what could happen later down the road.

Some sad news, which I previously posted on Facebook... did you know Betty Crocker is not real??? I had no idea! Turns out General Mills made it up... I was beyond surprised... and the only reason why I found this out was because I was thinking of being her for halloween but couldn't find a popular outfit she wore... I'm a goofball, I know.

So here we have it... Carrot Cake from a friend of my Aunt's.... it is absolutely delicious! I have never tasted a better cream cheese frosting!


Happy Birthday Jacki!

A special request from the birthday girl... Lemon Meringue Pie

There is always a first time for everything! My first time making this pie, and it turned out great (from the words of my taste testers)! Of course, when I cook, it doesn't always turn out great... just ask David, he has plenty of disaster stories. But let's not get into those now...

Just glad I could fulfill the birthday wishes of David's mom! Yay!

Here is the recipe...

Grandma's Lemon Meringue Pie

 
Ingredients
  • 1 cup white sugar
  • 2 tablespoons all-purpose flour
  • 3 tablespoons cornstarch
  • 1/4 teaspoon salt
  • 1 1/2 cups water
  • 2 lemons, juiced and zested
  • 2 tablespoons butter
  • 4 egg yolks, beaten
  • 1 (9 inch) pie crust, baked
  • 4 egg whites
  • 6 tablespoons white sugar 
Directions
  1. Preheat oven to 350 degrees F (175 degrees C).  
  2. To Make Lemon Filling: In a medium saucepan, whisk together 1 cup sugar, flour, cornstarch, and salt. Stir in water, lemon juice and lemon zest. Cook over medium-high heat, stirring frequently, until mixture comes to a boil. Stir in butter. Place egg yolks in a small bowl and gradually whisk in 1/2 cup of hot sugar mixture. Whisk egg yolk mixture back into remaining sugar mixture. Bring to a boil and continue to cook while stirring constantly until thick. Remove from heat. Pour filling into baked pastry shell.
  3. To Make Meringue: In a large glass or metal bowl, whip egg whites until foamy. Add sugar gradually, and continue to whip until stiff peaks form. Spread meringue over pie, sealing the edges at the crust.
  4. Bake in preheated oven for 10 minutes, or until meringue is golden brown.

Note: I did end up making my own pie crust. I use the classic pie recipe from the Crisco container! It's a nice flaky crust that went perfect with this pie!